STEP 2: CONNECTING INTERNET
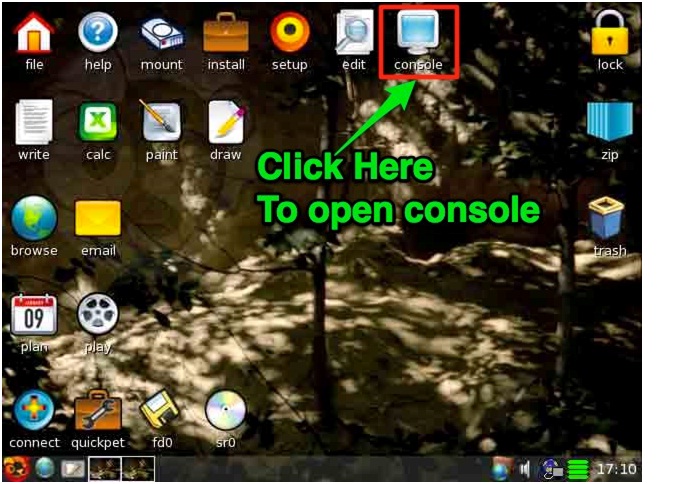
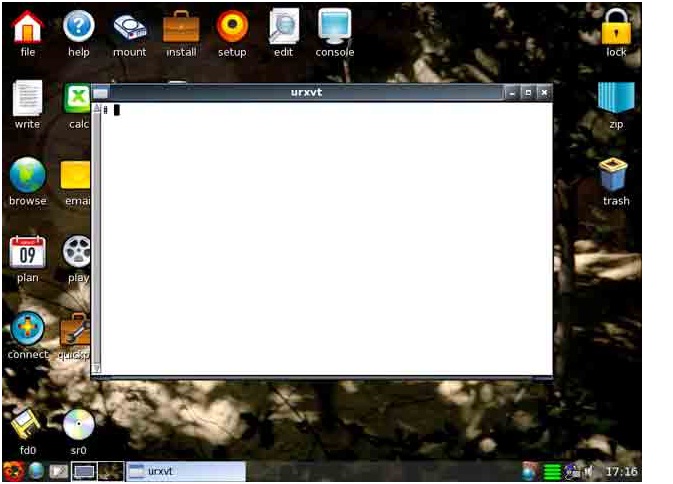
Our main agenda is to connect to internet. For that, we will follow following steps. If you have DHCP or preconfigured network, there is possibilities that we are already connected to the internet. ZIPSIP Live is configured in such a way that it tries to connect with the internet automatically at the time of loading. We can check if we are already connected with the internet. Click on Console icon on the desktop. It will open console window named “urxvt”
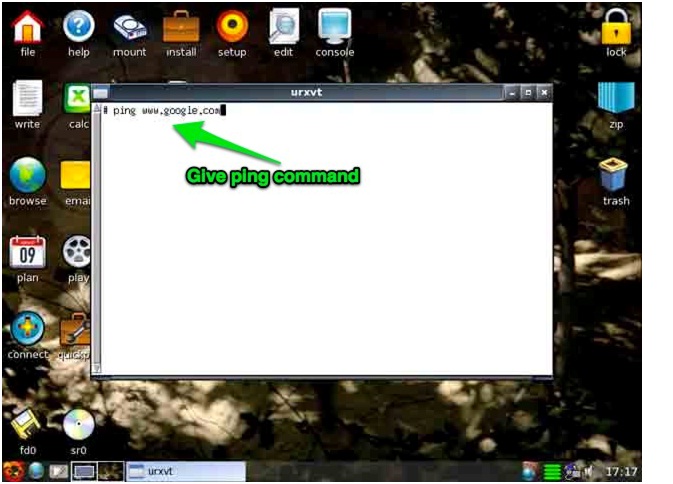
Select the window and write following command – ping www.google.com If we get ping response, that means we are already connected with the internet and we do not need to do anything else!! Follow from step 10 till end. ping responses are illustrated on images attached herewith. If you are not already connected with the internet, need to follow following steps. Press “Ctrl+C” to cancel ping. After canceling, close the window.
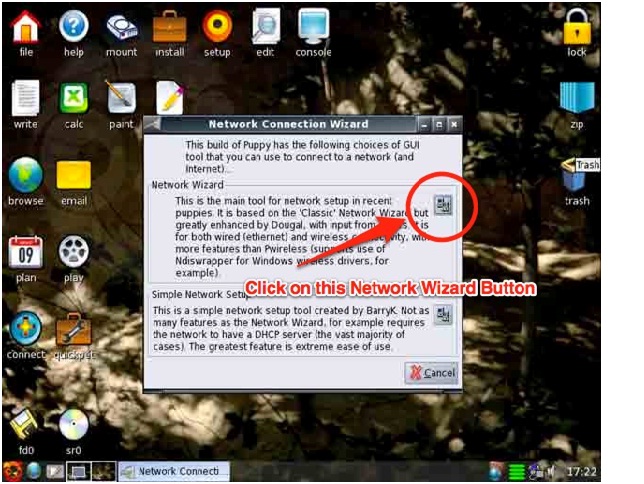
Previous step will start “Puppy Network Wizard.” Now, if you have connected the Internet cable into built-in LAN card, click on eth0 button. It will open “Configure network interface eth0″ window. If you have connected to External LAN Card, please go to Step:7
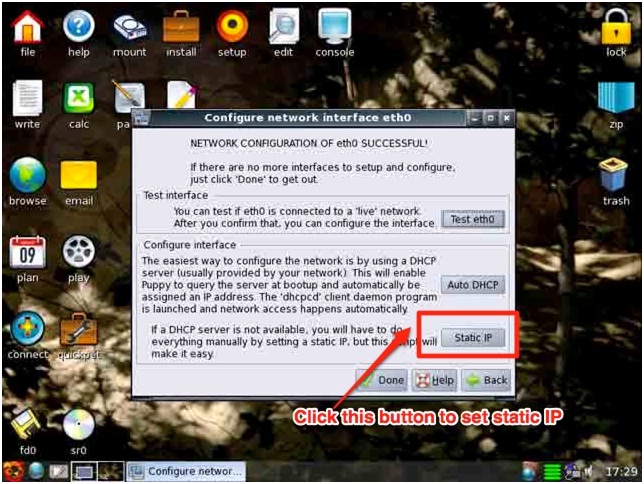
Here, we need to take decision whether we want to connect to internet with Static IP network or DHCP. If you have received Static IP information from your ISP (Or you have configured a network yourself), click on Static IP button. If you have DHCP network, please go to Step 6.
Static IP button will open window Set Static IP. Insert IP address, Net Mask, Gateway and DNS addresses to specified fields and click on OK button.There might be some warning and messages. Press OK/Yes every time until you see “Configure network interface eth0″ window again. If that window appears, click on Done button. Now once again Network Connection Wizard will appear. Click on “YES SET AS DEFAULT” button. There might be some other window as well, click on OK/YES button for every case.
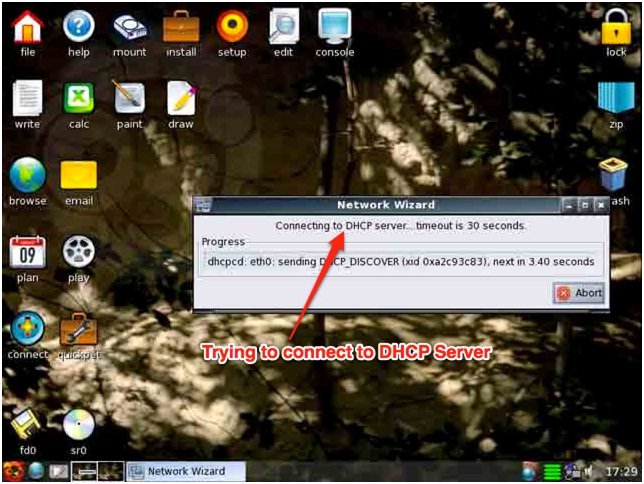
If we want to configure DHCP, that is also simple. Follow Step 1 – Step 3. If you have saved network settings previously, clicking on connect button might open Puppy Network wizard directly. Click on eth0 button and “Configure network interface eth0″ will appear. Click on Auto DHCP Button. It will try to connect with DHCP. Once connected, a Message will appear saying “NETWORK CONFIGURATION OF eth0 SUCCESSFUL!” Click YES button of that dialogue window and press Done button of “Configure network interface eth0″
If internet is connected to external LAN Card, we need to configure IP Address on external LAN Card. Follow step 2 – step 3. Please click on “eth1″ button. It will open “Configure network interface eth1″ window Here, we need to take decision whether we want to connect to internet with Static IP network or DHCP. If you have received Static IP information from your ISP (Or you have configured a network yourself), click on Static IP button. If you have DHCP network, please go to Step 8. Static IP button will open window Set Static IP. Insert IP address, Net Mask, Gateway and DNS addresses to specified fields and click on OK button.There might be some warning and messages. Press OK/Yes every time until you see “Configure network interface eth0″ window again. If that window appears, click on Done button. Now once again Network Connection Wizard will appear. Click on “YES SET AS DEFAULT” button. There might be some other window as well, click on OK/YES button for every case. If we want to configure DHCP, that is also simple. Follow Step 2 – Step 5. If you have saved network settings previously, clicking on connect button might open Puppy Network wizard directly. Click on eth1 button and “Configure network interface eth0″ will appear. Click on Auto DHCP Button. It will try to connect with DHCP. Once connected, a Message will appear saying “NETWORK CONFIGURATION OF eth1 SUCCESSFUL!” Click YES button of that dialogue window and press Done button of “Configure network interface eth0″ Perform the task of Step 1 once again and check if we are connected to the internet. If the answer is YES, then we are ready to go to next step. If we the computer is not connected with the Internet, please review the steps once again and check if informations you have provided was correct. You can re-enter your information and check again. Before that you better restart your computer. Sometimes Restarting a computer helps to apply changes. If you are connected to internet, we suggest to save the changes and restart the computer. Saving changes will confirm that if the computer is restarted some how, it will get same configuration when rebooted. Since this operating system and software are running on RAM and loaded from a USB Memory Key, settings will be saved to USB Key. Restarting the computer is easy. Click on the Red button at the bottom left of the Desktop. This is where Start menu of Windows Operating System resides. Click on that and Click on Shutdown, you will see another submenu Reboot. Click on that.
While rebooting, it will prompt to save settings. press enter or click on the button whatever is by default selected. Then it will be restarted and booted with the settings we did previously.
NEXT STEP: Collecting Information and Providing VoipZip Support ![]()

